There's a particular kind of magic that happens the first time you snip a single stem off a houseplant, drop it in a jar of water, and watch tiny white roots push out of the node two weeks later. Suddenly one plant becomes two. Two become ten. Your windowsill turns into a free plant factory — and your friends start showing up with empty jars.
Learning how to propagate houseplants is the single highest-leverage skill in indoor gardening. It costs nothing, it teaches you more plant biology in one season than any book, and it turns your collection into an engine for gifts, swaps, and trades. This guide walks you through the ten most popular houseplants to propagate — starting with the easiest — and gives you the specific, node-by-node instructions most beginner guides skip.
By the end, you'll know exactly how to propagate pothos (the gateway plant), how to propagate monstera (everyone's dream cutting), how to propagate snake plant (the one everyone gets wrong), and the exact moment to move water roots into soil without killing them.

Why Propagation Is the Best Thing You'll Ever Learn
Let's start with a surprising statistic: a healthy pothos vine can produce a viable new plant every 4 to 6 inches (10–15 cm) of stem. A single mature specimen in your living room contains, quite literally, dozens of future plants just waiting for you to pick up a pair of scissors. That's not marketing — that's basic botany. Every node on that stem is a dormant meristem, programmed to grow roots the moment it hits water or soil.
Propagation also happens to be the most sustainable thing you can do with a plant collection. Instead of buying nursery stock shipped in plastic pots from hundreds of miles away, you're making clones on your countertop. Instead of tossing leggy vines when you prune, you're turning them into gifts. Over a year, a single enthusiastic propagator can easily produce 50 to 100 new plants — enough to supply every office colleague, every new neighbor, and every local plant swap within driving distance.
And then there's the community angle. Once word gets out that you propagate, something shifts. You become the person people bring their sad, leggy, half-dead plants to. You start trading cuttings with other collectors — a rare variegated Monstera deliciosa for a string of pearls, a philodendron micans for a hoya. Plants become currency. That's where apps like Tendra's Plant Exchange come in, but we'll get to that in a minute.
The Four Propagation Methods You Actually Need to Know
Before we get into individual plants, it helps to understand the four methods that cover roughly 95% of popular houseplants. Pick the right method for the right plant and your success rate jumps from "maybe" to "almost always."
1. Stem Cuttings (the workhorse)
A piece of stem with at least one node — the small bump where a leaf meets the stem — is cut and placed in water or soil. This is how you propagate pothos, philodendron, monstera, tradescantia, hoya, pilea, and most trailing or vining houseplants. Stem cuttings are easy, fast, and forgiving. If a plant has a stem and visible nodes, stem cuttings will almost always work.
2. Division (the brute force method)
You unpot the mother plant, gently separate the root ball into two or more clumps, and repot each one. This is the go-to for rhizomatous and clumping plants like snake plant (Dracaena trifasciata), ZZ plant (Zamioculcas zamiifolia), peace lily, boston fern, calathea, and spider plant. Division is the highest success-rate method — you're basically just giving existing plants their own pot.
3. Leaf Cuttings
A single leaf (or leaf section) is rooted directly. This works for succulents, jade plants, African violets, and — with a twist — snake plants. Leaf cuttings are slower than stem cuttings, but they're the only option for plants that don't have obvious stems.
4. Air Layering
You wound a stem while it's still attached to the mother plant, wrap the wound in damp sphagnum moss, and wait for roots to form before cutting it free. This is the safety net for precious plants where you can't afford to lose a cutting — mature monstera, fiddle leaf fig, rubber tree, and variegated specimens where every leaf is worth $50.
Water vs. Soil Propagation: Which Should You Use?

This is the question every beginner asks, and the answer is: it depends, but water wins for most people most of the time.
Plant propagation in water is the friendliest method for anyone just starting out. You can see the roots, you can see rot the moment it starts, and you don't need any special equipment beyond a jar. Success rates for easy plants like pothos, philodendron, and tradescantia in water are routinely above 90%. The downside: water roots are structurally different from soil roots — thinner, more brittle, and adapted to a low-oxygen environment. When you eventually pot them up, they have to regrow a second set of "soil roots," and the plant sulks for a couple of weeks.
Soil propagation skips that transition entirely. A cutting put directly into moist, well-draining soil grows exactly the kind of roots it needs for its permanent home. But you can't see what's happening, you have to keep the soil consistently moist (not wet) for weeks, and your success rate on difficult plants drops noticeably. Soil is the right call for succulents, cacti, rosemary, and anything woody.
The rule of thumb: soft, green, juicy stems → water. Woody, semi-woody, or succulent stems → soil.
When to Transition Water Roots to Soil
Wait until the new roots are at least 2–3 inches (5–7.5 cm) long and have branched at least once. Any shorter and the cutting may not have enough root mass to survive the shock. Any longer and the water roots start to get tangled and break easily during transplant. When you do pot up, use a light, well-draining mix (regular potting soil cut 50/50 with perlite works great), water thoroughly, and keep the soil noticeably moister than usual for the first two weeks. Many growers bag the whole pot in a clear plastic bag for a week to maintain humidity during the transition.
How to Propagate Pothos: The Gateway Plant

If you only learn how to propagate one plant in your life, make it pothos (Epipremnum aureum). It is the easiest, fastest, most forgiving plant in the indoor world. A pothos cutting will root in a jar of tap water on a kitchen counter with almost zero intervention. If you can keep a glass of water full, you can propagate pothos.
Step-by-step:
- Find a healthy vine with at least 4–5 leaves and visible nodes. Nodes are the little brown bumps on the stem where leaves attach — often with a tiny aerial root nub already poking out.
- Cut with clean, sharp scissors about a quarter inch (0.6 cm) below a node. A diagonal cut gives you slightly more surface area for root formation. Each cutting should have 2–3 leaves and at least one node.
- Strip the bottom leaf if there's one close to the cut — you don't want any leaf sitting in the water, which rots fast.
- Drop it in a jar of room-temperature water, making sure the node is submerged. Place the jar in bright, indirect light — not direct sun, which overheats the water.
- Change the water every 4–7 days. This is the single most-skipped step and the number-one cause of failure. Fresh water = oxygen = roots.
- Wait 10–21 days. Roots will emerge from the submerged node. When they hit 2–3 inches, you can either pot up into soil or just leave the cutting in water forever — pothos thrives as a permanent hydroponic plant.
Pro tip — the buddy system: pothos releases natural rooting hormones (indole-3-butyric acid and related auxins) into the water as it grows roots. Put a harder-to-propagate cutting — fiddle leaf fig, rubber tree, rosemary — in the same jar as a pothos cutting, and the pothos will chemically signal the other plant to root faster. It's free rooting hormone.
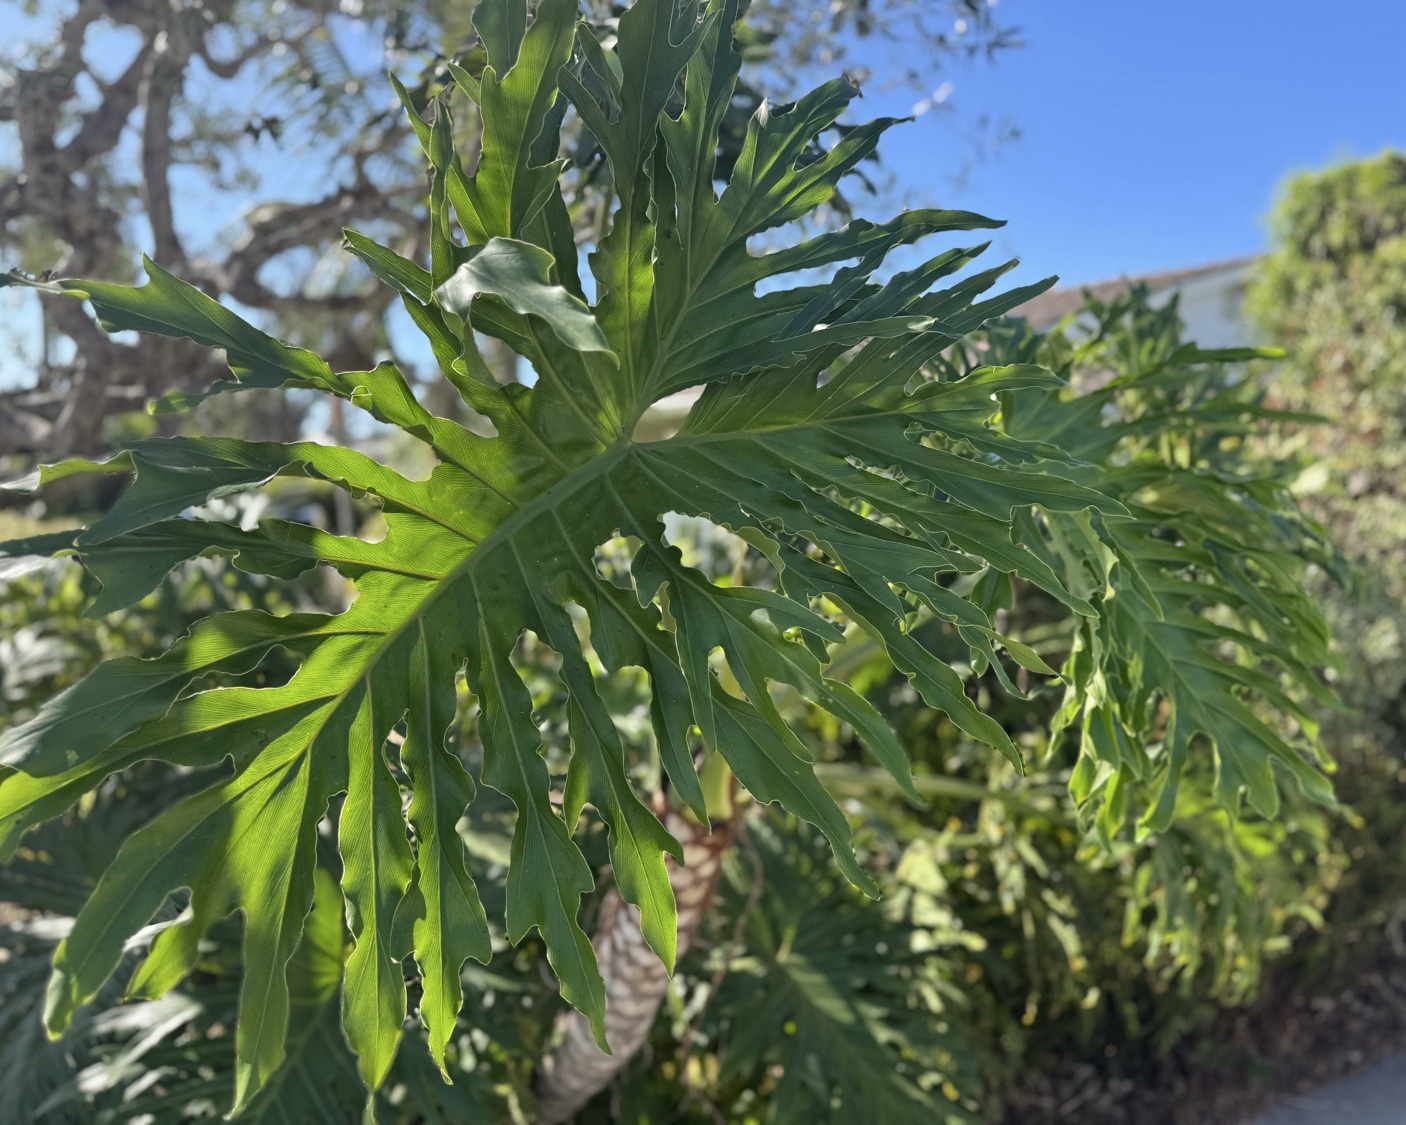
How to Propagate Monstera (and Save the Aerial Root)

Here's the single most important thing to know about how to propagate monstera: the cutting must include a node. A leaf with a stem but no node will sit in water for six months, stay green, look healthy, and never, ever grow roots. This is the mistake that ends more monstera propagation attempts than any other.
A monstera node is a slightly swollen ring on the stem, often with a brown, woody-looking aerial root already attached. If you can see that aerial root, you have gold — that nub becomes your water roots almost immediately. For Monstera deliciosa and its relatives, the combination of a node plus an aerial root is basically a pre-rooted plant.
Step-by-step:
- Identify the node. Look along the main stem for the ring where a petiole meets the stem. Ideally, find one with a visible aerial root.
- Cut with a very sharp, clean knife or pruners. Make the cut about half an inch (1.25 cm) below the node, and above the next node up. Each cutting should have at least one leaf and one node.
- Let the cut callous for a few hours. Monstera stems are thick and juicy; letting the wound dry briefly reduces rot risk.
- Place in a tall, narrow vase of water, deep enough that the node and aerial root are fully submerged but the leaf stays dry.
- Change the water weekly. Monstera water goes cloudy fast — don't let it.
- Wait 3–6 weeks for substantial water roots. Pot up into a chunky aroid mix (potting soil, perlite, and orchid bark) when roots reach 3 inches. Monsteras are cousins of philodendron — they love the same chunky, airy mix. If you're new to this group of plants, our complete guide to philodendron care covers the soil recipe in detail.
For mature monsteras where you don't want to risk a cutting, air layering is the safer play. Wound the stem just below a node, wrap it in damp sphagnum moss, cover with plastic wrap, and wait for roots to form before you ever separate it from the mother plant. Zero risk, 100% success rate.
How to Propagate Snake Plant (the One Everyone Gets Wrong)

Snake plant propagation trips up more beginners than any other popular houseplant, for one specific reason: orientation matters. A snake plant leaf section that's planted upside-down will never root. Ever. The leaf has a polarity — the end that was closest to the roots has to stay at the bottom.
There are two methods for how to propagate snake plant. Division is the reliable, fast option. Leaf cuttings are the slower, more fun option that lets you turn one leaf into five plants.
Method A: Division (Fast and Foolproof)
- Unpot the mother plant and gently tease the rhizomes apart. You're looking for natural separations — clusters of leaves with their own roots.
- Use a clean knife to cut through any stubborn rhizomes between clusters.
- Repot each division in its own pot with cactus or succulent soil. Water lightly and wait a week before the first real watering.
That's it. You've just turned one plant into three.
Method B: Leaf Cuttings (for Unlimited Plants)
- Cut a healthy leaf from the base.
- Slice the leaf horizontally into 3-inch (7.5 cm) sections.
- Mark the bottom of each section with a small notch or arrow. This is the non-negotiable step. If you lose track of which end is down, the section will not root.
- Let the cut ends callous for 2–3 days.
- Stick the bottom end (only the bottom!) about half an inch into slightly damp cactus soil, or into a shallow glass of water.
- Wait 6–8 weeks. Eventually, tiny new leaves will push up from the base of each section — these are pups, and they'll grow into full plants.
One important warning: variegated snake plants (the ones with yellow edges) lose their variegation when propagated by leaf cutting. The new pups will come out solid green. If you want to keep the variegation, you have to use division. For the full care story once your pups are established, check our complete guide to snake plant care.
The Rest of the Top 10: Quick Propagation Playbook
Here's the short version for the other popular houseplants people ask about most.
- Philodendron — stem cuttings in water, same as pothos. Cut below a node, drop in water, wait 2–3 weeks.
- Spider plant (Chlorophytum comosum) — the easiest of all. Snip a baby "spiderette" off the flower stalk and either pot it directly or root in water for a week first.
- Tradescantia / wandering dude — arguably easier than pothos. Every joint is a node. Cuttings root in water in under a week.
- ZZ plant — division is fast; leaf cuttings work but take up to 9 months. Patience required.
- Rosemary — semi-woody stem cuttings, 4 inches long, dipped in rooting hormone and stuck in moist perlite. Not a water-prop plant.
- Christmas cactus (Schlumbergera) — twist off a 2-segment piece, let it callous for a day, then press into damp soil. Roots in 2–3 weeks.
- Succulents and jade — leaf cuttings. Twist off a healthy leaf, let it callous for 3 days, lay it on dry soil, mist occasionally. Baby plants appear at the base.
- Orchids — most orchids propagate via "keikis," the baby plantlets that form on flower spikes. Wait until the keiki has 2–3 roots of its own, then cut it free. For the full walkthrough, see our guide to orchid care.
- Cactus — offsets or "pups" can be gently twisted off, callused for a week, and placed on dry cactus soil. Our complete cactus care guide has the watering schedule that keeps new pups from rotting.
When to Propagate: Timing Matters More Than You Think
Here's a surprising fact: the same pothos cutting can root in 10 days in May or 40 days in December. Plants have internal growth cycles tied to day length and temperature. Spring and early summer — roughly March through July in most of the Northern Hemisphere — are when houseplants are actively growing, producing auxins, and most eager to root.
You can propagate in winter, but you'll see slower roots, higher rot rates, and sulkier cuttings. If you're a beginner, start in spring. You'll stack the deck heavily in your favor. This is one of those details that makes Tendra's smart care reminders genuinely useful — the app will ping you when your specific climate zone hits its propagation sweet spot, instead of making you guess from a static calendar.
Common Propagation Mistakes (and How to Avoid Them)

After years of watching beginners propagate, the same handful of mistakes show up over and over. Every one of them is easy to fix once you know about it.
- Cutting too far from the node. If you leave 2 inches of stem below the node, that extra stem just rots. Cut no more than half an inch below the node.
- Never changing the water. Stagnant water goes anaerobic in about 10 days. Roots can't form in low-oxygen water. Change it every 4–7 days, minimum.
- Too much direct sun. Cuttings don't have roots yet — they can't replace water lost to sun-driven transpiration. Bright indirect light only. A south-facing window is usually too intense.
- Planting too deep. When you pot up a rooted cutting, the node that grew the roots should sit just below the soil surface. Burying the whole stem invites stem rot.
- Using dirty scissors. Unclean cuts introduce bacteria and fungi that cause rot. Wipe your blade with rubbing alcohol between cuttings.
- Giving up too early. A monstera cutting can take a month. A ZZ leaf can take nine months. Patience is a propagation skill.
Rooting Hormone: When You Need It, When You Don't
Rooting hormone (usually indole-3-butyric acid, sold as a gel or powder) is a shortcut that helps cuttings produce roots faster. You don't need it for easy plants — pothos, philodendron, tradescantia, spider plants, and most vining aroids root just fine in plain water. Skip it.
You do want it for woody or semi-woody cuttings where success rates are marginal: rosemary, fiddle leaf fig, rubber tree, hibiscus, dracaena, and any lignified stem. Dip the cut end in hormone, tap off the excess, and stick into a moist, well-draining propagation medium (perlite or a perlite/peat mix works great). Rooting hormone roughly doubles the success rate on these tough-to-root species.
Sarah's Story: Turning Propagation into a Community Currency
Sarah from Portland started propagating almost by accident. Her office pothos got leggy, she snipped off three cuttings so she could rehome them, and four weeks later she had three rooted plants and no idea what to do with them. She gave them away. Within a month, her coworkers were bringing her their own leggy vines asking if she could "do the thing." Within three months, she had a rotating setup of 20 propagation jars on her kitchen windowsill and was trading rooted cuttings for sourdough starter, homemade jam, and — on one memorable occasion — a used Dutch oven.
What Sarah discovered is that propagation isn't really about plants. It's about the network. Every rooted cutting you give away is a tiny social contract: I grew this, you take care of it, and somewhere down the line you give one of its babies to someone else. Over the course of a year, Sarah's 20 jars turned into roughly 80 plants scattered across Portland. Her own collection got bigger because her friends started bringing her rare cuttings they couldn't keep alive. It became a closed-loop economy of plants.
That's exactly the kind of network Tendra's Plant Exchange was built around. Instead of mailing cuttings across the country or guessing what your neighbors have, you can see exactly who's propagating what within a few miles of you — and whether anyone nearby has that one rare variegated philodendron you've been hunting for six months. Twin Plant Mates matches you with local growers who are already succeeding with the exact species you want to try, so you get advice dialed in to your actual climate, not a generic forum post.
Your Next Step
Learning how to propagate houseplants is the rare hobby where the skill compounds. Every rooted cutting makes the next one easier. Every plant you give away becomes a story. Every windowsill jar of water is a tiny lesson in how plants actually work. Start with a pothos cutting today, and by next spring you'll have a collection — and a network — you didn't know was possible.
Track your propagation experiments with Tendra — log cuttings, monitor root growth, and never forget which plant is which. Discover your local plant community with Tendra — where local gardeners connect and thrive.