Have you ever done everything by the book—perfect sunlight, a consistent watering schedule, even the best fertilizer—only to watch your plants look sickly and refuse to thrive? It’s a frustrating mystery, but the culprit is often an invisible force working against you right in your own garden: your soil pH. This single number dictates whether your plants feast or famine, and understanding it is the key to unlocking a truly thriving garden.
This guide will demystify soil pH, transforming it from a confusing chemistry term into your most powerful gardening tool. You’ll learn what it is, how to test it without fuss, and the exact steps to adjust it for picture-perfect plants. Let's dig in and solve this underground puzzle together.
Why Your Perfect Garden Might Be Failing
Think of soil pH as a gatekeeper that stands between your plants and the nutrients they desperately need. If that gate is locked, it doesn't matter how much plant food you offer; your plants simply can't get to it. This common problem is called nutrient lockout, and its symptoms can look a lot like other issues, sending you down the wrong path for a fix.
It's easy to mistake nutrient lockout for some kind of plant disease, which is a classic pitfall for even seasoned gardeners. You end up treating the symptoms without ever addressing the root cause. This is where getting insights from gardeners who’ve tackled the same local soil challenges can be a game-changer.
This guide will pull back the curtain on soil pH, clearing up the confusion and showing you exactly how to get your garden back on track. We're going to cover:
What soil pH actually is, explained in simple terms.
Practical, no-fuss ways to test the soil in your own backyard.
Step-by-step methods for tweaking your soil to get it just right.
It’s time to empower you with the knowledge to fix your garden, starting from the ground up.
Understanding the Science of Soil pH
So, what exactly is soil pH? Think of it as the gatekeeper of your garden's pantry. It's a simple measurement on a scale from 0 to 14 that determines which nutrients are actually available for your plants to eat.
A pH below 7.0 is acidic, 7.0 is perfectly neutral, and anything above 7.0 is considered alkaline (or "sweet"). The sweet spot for most garden plants—from your tomatoes to your roses—hovers in a slightly acidic range, usually between 6.0 and 7.0.
Why that specific window? Because it's where the most important nutrients—nitrogen, phosphorus, and potassium—are unlocked and ready for plant roots to absorb.
The Problem of Nutrient Lockout
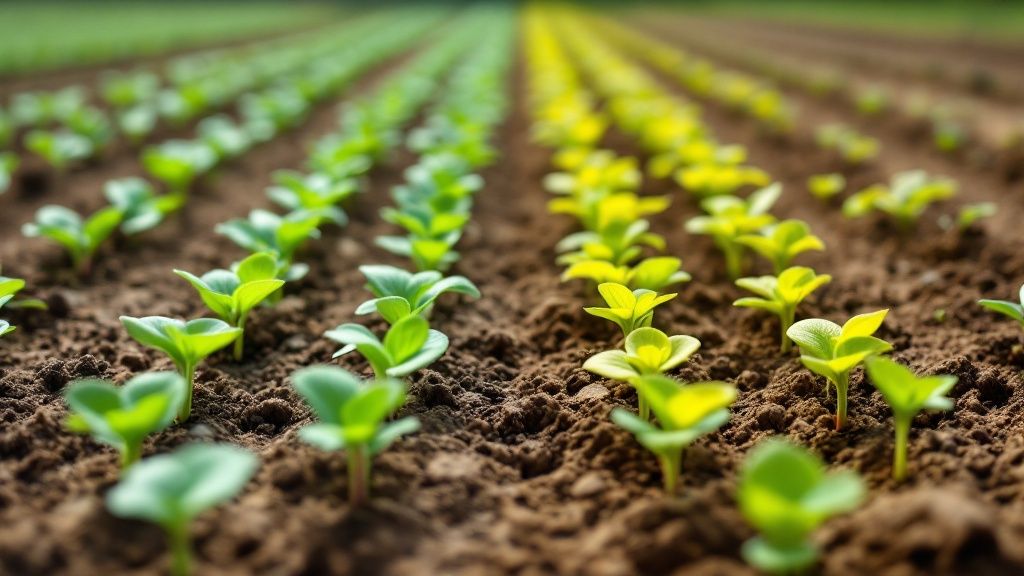
When your soil pH swings too far in either direction, you run into a frustrating problem called nutrient lockout. This is where your soil can be loaded with all the good stuff from compost and fertilizer, but your plants are still starving.
The pH has effectively locked the pantry door. This is when you start seeing tell-tale signs of deficiency, like yellowing leaves (chlorosis) or stunted growth. Your first instinct might be to add more fertilizer, but the real issue is the soil's chemistry.
Understanding your local soil is the first step to avoiding this. Tendra's Twin Plant Mates feature is a huge help here, connecting you with gardeners in your area who’ve already figured out the quirks of the native soil pH.
How Soil pH Varies Across the Globe
This isn't just a backyard issue; it's a global pattern. Soil pH is heavily influenced by climate, especially the tug-of-war between rainfall and evaporation.
Here’s a surprising fact: In a massive study, researchers analyzed about 60,000 soil samples from around the world and found a clear divide. Rainy climates tend to have acidic soil because the water leaches out alkaline elements. Arid regions, on the other hand, typically have alkaline soil. You can discover more about these global soil pH findings.
That's why a gardener in drizzly Portland, Oregon, is often battling acidity, while a gardener in sun-baked Phoenix, Arizona, is usually dealing with alkalinity.
Key Takeaway: Soil pH isn’t just a number; it’s the master controller of nutrient availability. The wrong pH means your plants can starve in a feast, unable to access the food right under their roots.
The table below breaks down how different pH levels impact the availability of essential nutrients.
How Soil pH Affects Nutrient Availability
This table gives a quick look at how the pH scale works in your garden, showing what each range means for nutrient uptake.
pH Range | Soil Type | Impact on Nutrient Availability |
|---|---|---|
4.0 - 5.5 | Strongly Acidic | Problem: Major nutrient lockout. Nitrogen, Phosphorus, and Potassium are largely unavailable. Can lead to aluminum toxicity in some plants. |
5.5 - 6.5 | Slightly Acidic | Optimal: The "sweet spot" for most garden plants. Nearly all major and minor nutrients are readily available for absorption by plant roots. |
6.6 - 7.3 | Neutral | Good: Most nutrients are still available. A good range for lawns and many common vegetables. |
7.4 - 8.5 | Alkaline | Problem: Phosphorus, Iron, and Manganese become less available, leading to deficiencies. Common in dry, arid climates. |
As you can see, hitting that slightly acidic to neutral zone is where the magic happens for most plants, ensuring they can get everything they need to thrive.
How to Accurately Test Your Soil pH
Knowing your soil's pH is the critical first step to unlocking its potential. Before you can "fix" anything, you need a clear baseline. Guessing is a recipe for disaster—you could apply the wrong amendments and actually make your problems worse.
Thankfully, testing your soil pH is easier and more accessible than ever. Let's walk through the most common methods available to you so you can pick the one that makes the most sense for your garden.
The Foundation of a Good Test is a Good Sample
No matter which testing method you choose, your results are only as good as the soil sample you take. A single scoop from one spot won't tell you the whole story. Your garden soil isn't perfectly uniform; the pH can vary even just a few feet away.
To get a true picture of your garden bed or lawn, you need to create what's called a composite sample. It sounds technical, but it’s really simple.
Gather Your Tools: You just need a clean bucket, a trowel or soil probe, and maybe some small bags if you're testing multiple areas.
Collect Subsamples: Take 5-7 small samples from different spots across the area you want to test. Dig down about 6 inches (15 cm)—that's the root zone where most of the action happens for garden beds and lawns.
Mix Thoroughly: Dump all these little samples into your clean bucket. Break up any clumps and give it a good mix until everything is blended together.
Prepare for Testing: From this well-mixed batch, you'll take the small amount of soil needed for your test. This little trick ensures your reading is a solid average of the entire area.
Choosing Your Testing Method
You've basically got three main options for testing your soil pH, each with its own pros and cons. Think about what you're trying to achieve. Are you just curious, or are you troubleshooting a serious plant health issue?
Method 1: DIY Test Kits
These are the classic kits you see at every garden center. They usually have test strips or capsules that you mix with a slurry of soil and water. The solution changes color, and you match it to a chart.
Pros: Super affordable, easy to find, and dead simple to use. They give you a quick, general idea of where you stand.
Cons: They give you a range (like 6.0-6.5), not a precise number. Matching colors can be a bit subjective, so accuracy can vary.
Best For: Gardeners who just need a quick ballpark figure and aren't dealing with major plant meltdowns.
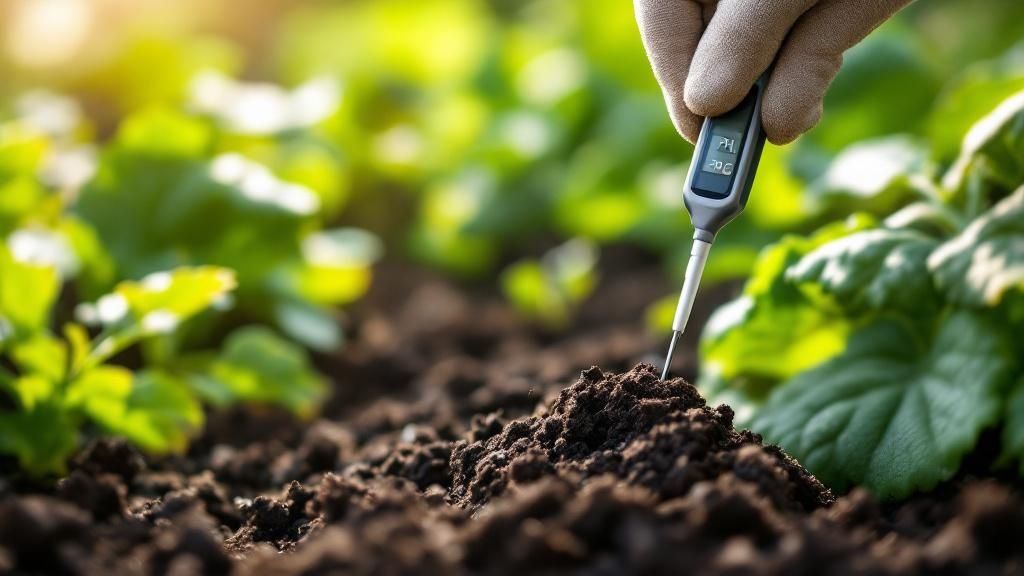
Method 2: Digital pH Meters
If you want more precision without going broke, a digital pH meter is a fantastic step up. These are reusable electronic probes you stick directly into moist soil (or a soil slurry), giving you a specific number on a digital screen.
Pros: Reusable, provide a precise number (e.g., 6.2), and give you instant results.
Cons: They need to be calibrated regularly with buffer solutions to stay accurate. The really cheap ones can be unreliable, so it's worth investing in a decent one.
Best For: Serious gardeners, houseplant collectors with lots of pots, and anyone who plans on testing their soil more than once.
This infographic breaks down the basic process for getting a good sample ready for testing.
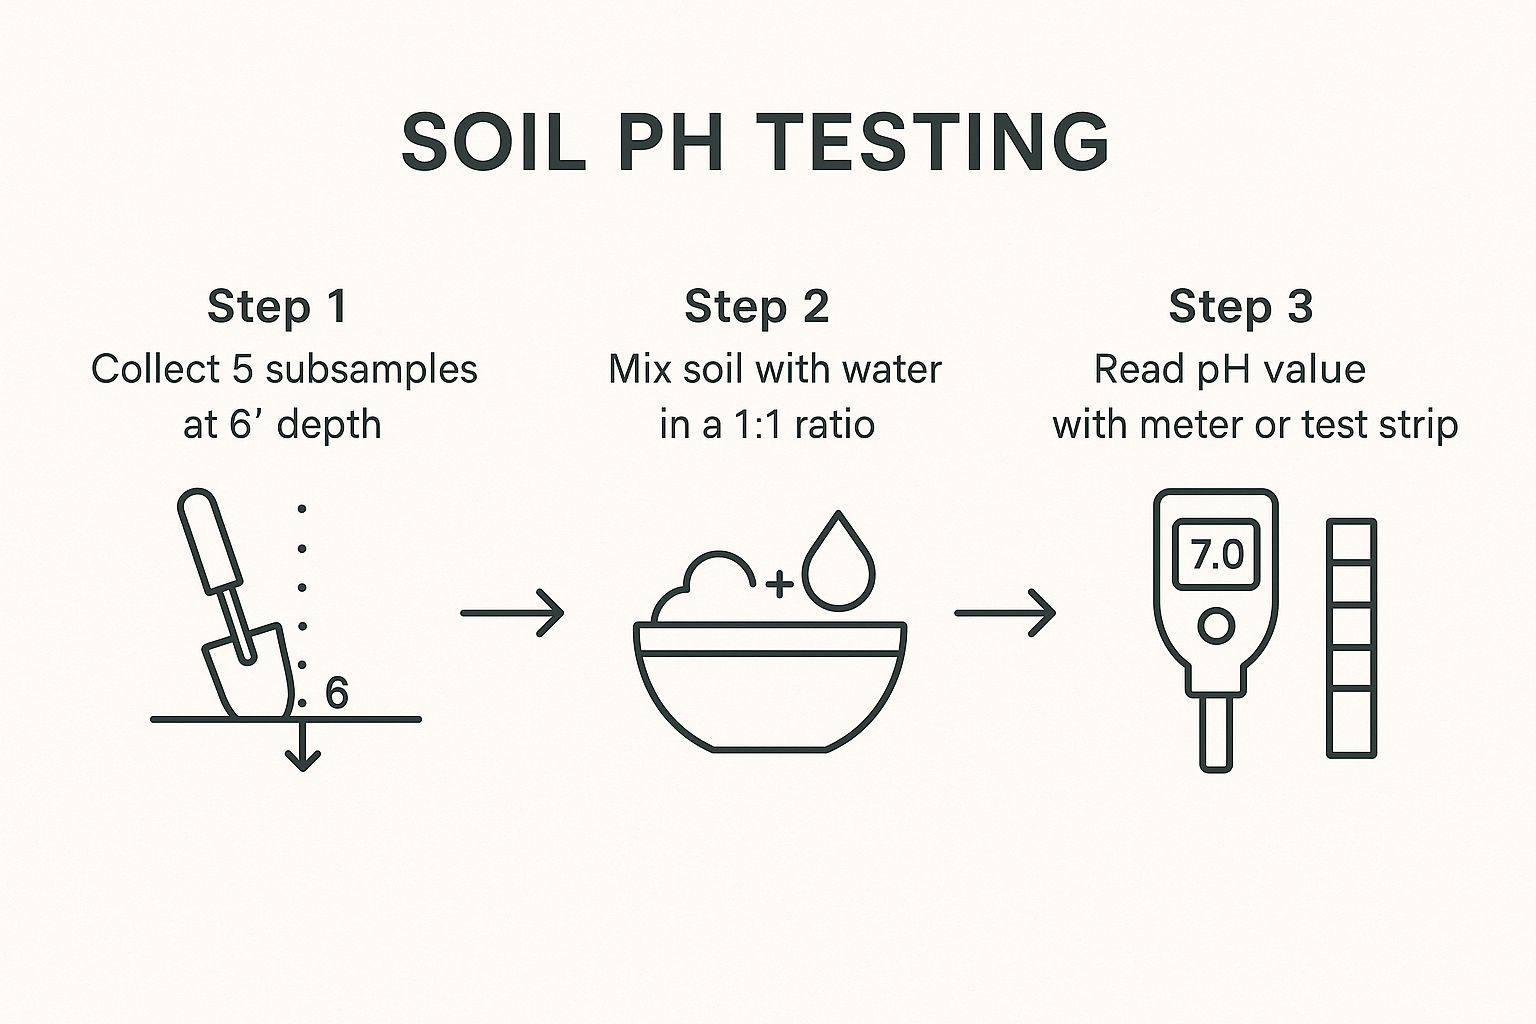
It really drives home the point that a trustworthy test begins long before you grab your meter or test strip—it all starts with a good, representative sample.
Method 3: Professional Lab Testing
When you need the absolute most accurate and detailed information, nothing beats sending a sample to a professional lab, like your local university cooperative extension office.
Pro Tip: Professional lab tests go way beyond just soil pH. They often give you a complete nutrient profile, tell you your organic matter content, and provide specific amendment recommendations tailored to your exact soil.
Pros: Extremely accurate and reliable. You get a ton of detailed info beyond just pH, along with professional, science-backed advice.
Cons: It's the most expensive option (usually $15-$50 per sample) and you have to wait for the results (typically 1-2 weeks).
Best For: Gardeners starting a brand new garden, troubleshooting stubborn and costly plant problems, or anyone aiming for maximum yields in their veggie patch.
How to Raise pH in Acidic Soil
If your soil test came back with a number hovering below 6.0, you’ve officially got acidic soil on your hands. It’s a super common issue, especially in places that get a lot of rain, which tends to wash away alkaline minerals over the years. Your mission, should you choose to accept it, is to "sweeten" the soil by adding alkaline amendments.
Think of it as neutralizing that excess acid, making the soil a much friendlier place for most garden plants to live. Raising the soil pH is really about unlocking nutrients that were chemically tied up and unavailable to your plant’s roots. We're aiming for a slow, steady change, not a sudden shock to the system.
Your Go-To Amendments for Acidic Soil
When it’s time to raise your soil’s pH, a few tried-and-true amendments do all the heavy lifting. They aren't all created equal, so your choice depends on what else your soil might be missing besides a balanced pH.
Agricultural Lime (Garden Lime): This is the old standby for a reason. It's affordable, effective, and made from pulverized limestone (calcium carbonate). It gets straight to the point by reacting with soil acids to raise the overall pH.
Dolomitic Lime: Here's a great two-for-one deal. Just like garden lime, it boosts pH, but it also brings a healthy dose of magnesium to the party along with calcium. If your soil test came back showing a magnesium deficiency, this is your clear winner.
Wood Ash: Have a fireplace or a wood stove? You’ve got a ready-made soil amendment. Wood ash is highly alkaline and gets to work fast, but you have to be careful. A little goes a long way, and too much can cause a drastic pH spike and add a ton of excess salts to the soil.
Practical Tip: Whatever you do, avoid using hydrated lime (also called builder's lime) in the garden. It's incredibly potent and can easily burn your plants and damage the delicate soil ecosystem. Stick with the agricultural or dolomitic stuff for safe, predictable results.
Application Timing and Technique
When and how you add these amendments is just as important as what you add. Just tossing lime on top of the soil won’t get you very far.
When to Apply
The absolute best time to apply lime is in the fall. This gives the material months to slowly react with the soil over the winter, meaning your pH will be right where you want it when spring planting season arrives. The natural freeze-and-thaw cycles of winter actually do some of the work for you, helping to mix the lime into the soil.
How to Apply
For this to work, you have to get the amendment down into the root zone where it matters.
Calculate the Right Amount: Your soil test should give you a recommended application rate, usually in pounds per 100 square feet. A common rate is around 5 pounds per 100 sq ft to raise the pH by one full point, but this can change. Clay soils, for instance, need a lot more lime than sandy soils to see the same effect.
Spread It Evenly: A broadcast spreader is your best friend for lawns or large areas. If you're just working in a garden bed, you can scatter it by hand.
Work It In: This is the most important step. Grab a tiller, garden fork, or a sturdy rake and mix the lime into the top 4-6 inches (10-15 cm) of soil. This physical mixing is what really kicks off the chemical reaction and delivers the benefits to the roots quickly.
How to Lower pH in Alkaline Soil
So, your garden is on the alkaline side of the spectrum. Don't worry, it's a common challenge, especially if you live in a drier region where minerals tend to build up in the soil. When a soil test comes back with a pH above 7.5, your soil is considered "sweet."
The problem? In high-pH soils, essential nutrients like iron and manganese get locked up, chemically unavailable to your plants. This is a deal-breaker for acid-loving classics like blueberries (Vaccinium corymbosum), azaleas (Rhododendron), and gardenias, which will struggle and show signs of distress.
To fix this, we need to lower the soil pH by adding amendments that introduce acidity. This is a marathon, not a sprint. Making soil more acidic is a much slower, more gradual journey than making it more alkaline. But with patience and the right approach, you can create the perfect acidic environment for your favorite plants to absolutely flourish.
Choosing Your Acidifying Amendments
When aiming to lower your soil pH, there are several effective methods to consider. The best option for your garden will depend on the urgency of the change you need and whether you also want to enhance the organic content of your soil.
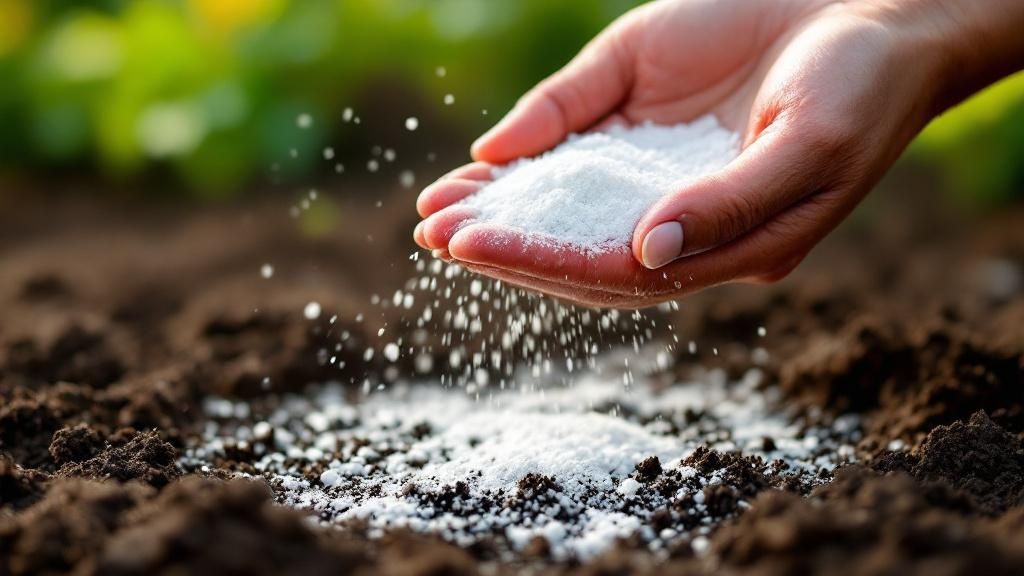
Elemental Sulfur: This is a popular choice among gardeners due to its affordability and effectiveness for reducing soil pH over a wide area. However, it requires time to work, as soil bacteria must convert the sulfur into sulfuric acid, a process that can take several months. Warm, moist soil is necessary for these microbes to function properly.
Sphagnum Peat Moss: This is an excellent organic option. Peat moss is naturally acidic, with a pH ranging from 3.0 to 4.5. It's ideal for mixing into planting holes for new shrubs or for integrating into entire garden beds. Besides lowering pH, it also improves soil structure and moisture retention.
Organic Matter: Compost, aged pine bark, and pine needles are mildly acidic and, while they won't drastically lower pH on their own, their consistent addition over the years helps maintain a slightly acidic environment while enriching the soil.
Iron Chelate: This compound can be used to lower soil pH and is particularly effective when iron deficiency is also a concern. Adding iron chelate helps make iron more available to plants, while also contributing to a gradual reduction in soil pH.
Practical Tip: Steer clear of aluminum sulfate. Yes, it acidifies soil very quickly, but that speed comes at a cost. It's incredibly easy to over-apply, which can lead to aluminum toxicity in your plants and cause serious harm to the beneficial life in your soil. Elemental sulfur is a much safer, more controlled solution for the long haul.
Application Strategy and Patience
To effectively lower your soil's pH, you have to get the amendment down into the root zone. Just tossing it on top of the ground isn't going to do much.
If you're starting a new garden bed, you're in luck. This is the perfect time to till or spade your chosen amendment into the top 6-8 inches (15-20 cm) of soil before you plant anything.
For established plants, you'll need to be a bit more delicate. Gently work the amendment into the top inch or two of soil around the plant's drip line—the area directly under its outermost leaves. Be careful not to disturb the roots. Plan on repeating this process once a year until you hit your target pH. Remember, this is a slow dance with your soil's chemistry. It's always better to add a little less than you think you need and test again in six months to a year.
Comparing Amendments for Lowering Soil pH
Choosing the right amendment can feel a bit overwhelming, so let's break down the most common options to see how they stack up against each other.
Amendment | Speed of Action | Best For | Important Notes |
|---|---|---|---|
Elemental Sulfur | Slow (6-12 months) | Long-term pH adjustment in large garden areas or for significant pH drops. | Requires warm, moist soil for microbes to activate. The safest and most controlled option. |
Sphagnum Peat Moss | Moderate (1-3 months) | Amending planting holes for new acid-loving plants or improving soil structure in small beds. | Adds valuable organic matter and improves water retention. Can be costly for large areas. |
Organic Matter | Very Slow (Years) | Maintaining slightly acidic conditions and improving overall soil health gradually. | Best used as a soil conditioner in combination with other amendments. Not for rapid pH changes. |
Acidic Fertilizers | Fast (Weeks) | Providing a temporary nutrient boost and minor pH dip for established plants. | Not a long-term solution for changing the soil's fundamental chemistry. |
Ultimately, the best strategy often involves a combination of these methods. Using elemental sulfur for the heavy lifting and incorporating organic matter every year is a fantastic way to create and maintain the acidic soil your plants will love.
Putting It All Together: A Tale of Two Gardens
Theory is great, but seeing it all click in a real garden is where the magic happens. Let's walk through a couple of scenarios with two gardeners from the Tendra community to see how mastering soil pH completely turned their seasons around.
Sarah's Hydrangea Color Problem in Portland
Sarah, a passionate gardener in the rainy Pacific Northwest, was stumped. Her prized Bigleaf Hydrangeas (Hydrangea macrophylla) were giving her gorgeous blue flowers, but what she really wanted were those vibrant, show-stopping pink blooms. This is a classic soil pH problem in action! The flower color on these hydrangeas is a direct signal of your soil's chemistry. In acidic soil (pH below 6.0), the plant can easily absorb aluminum, which turns the flowers blue.
Solution: Following advice from her Tendra network, Sarah did a soil test that confirmed her pH was 5.8. That fall, she worked dolomitic lime into her garden beds. The next summer, the pH had climbed to a much friendlier 6.6. The result? The brilliant pink blooms she had been dreaming of, all thanks to a simple pH adjustment.
David's Blueberry Dream in Phoenix
Meanwhile, David in sunny Phoenix had the exact opposite problem. He was determined to grow his own blueberries, but those plants crave acidic soil. His soil test came back with a whopping 8.0 pH—highly alkaline and completely wrong for what he wanted to grow.
Knowing his local climate and soil was the first step, something you can learn more about in our gardener's guide to the USDA planting zone chart. Instead of fighting his native soil, David got creative. He built a dedicated raised bed and filled it with a special acidic soil mix, amending it further with elemental sulfur. This created the perfect little pocket of acidic earth, and now he enjoys fresh blueberries right from his own backyard.
Master Your Garden From the Ground Up
To get the garden you're dreaming of, you have to look past the leaves and flowers and start with the soil itself. If there's one thing to take away, it's that soil pH is the invisible but powerful force calling the shots on your plants' health.
The core lesson is pretty simple: test your soil, make slow and steady adjustments, and then check in again every so often to make sure you’re still on track. This isn't just about owning plants; it's about becoming a true garden steward.
Think of it as a fundamental step, just as important as the basics we covered in our beginner's guide to starting a garden. Your journey doesn't stop here, of course. It just evolves with every season and every new plant you decide to grow.
Want to connect with local gardeners who have already figured out the unique soil challenges in your area? Discover Twin Plant Mates with Tendra—where local gardeners connect and thrive.
Answering Your Top Soil pH Questions
Even when you've got the basics down, a few common questions always seem to pop up once you start paying closer attention to your soil pH. Let's dig into some of the most frequent ones to clear up any confusion.
How Often Should I Really Be Testing My Soil?
For a general garden check-up, testing your soil pH every 2-3 years is a solid plan. This frequency gives you a great overview of your soil's long-term health without getting obsessive about it.
That said, there are definitely times you'll want to test outside of that regular schedule:
Breaking New Ground: Always test when you're starting a new garden bed to know your baseline.
Troubleshooting Plants: If you see telltale signs of nutrient issues—like yellowing leaves or weak growth—and you know it isn't a watering or pest problem, a pH test is your next logical step.
Planting pH Divas: Before you put in plants that are notoriously fussy about pH (I'm looking at you, blueberries and hydrangeas), do a quick test to make sure they'll be happy.
Think of it like a routine physical for your garden. It’s the best way to catch problems before they start.
Can My Front Yard Have a Different pH Than My Backyard?
Yes, absolutely! This is one of those things that surprises a lot of gardeners. Your yard isn't one big, uniform chemical soup; it's more like a patchwork quilt of different conditions.
You'll often find these little pH "hotspots" for a few common reasons:
Near Concrete Walkways or Foundations: Lime can slowly leach out of concrete, raising the pH and making the soil right next to it more alkaline.
Under Pine Trees: All those fallen needles aren't just messy—they're acidic. Over the years, they can gradually lower the soil pH directly under the tree's canopy.
Around Downspouts: Areas where rainwater pools can become more acidic over time. Why? The water washes away alkaline minerals like calcium, leaving the soil more acidic.
This is exactly why taking a "composite sample" from several spots in a single garden bed is so crucial. It gives you an accurate average instead of a misleading reading from one weird spot.
Will Adding Compost Fix My pH?
This is a fantastic question, and the answer gets to the heart of what compost really does. While compost is the superhero of soil health, it's not a quick fix for major pH imbalances.
Here's the key distinction:
Compost is a pH buffer. It helps your soil resist big, sudden swings in either direction, kind of like a shock absorber. With consistent use over many years, it will gently nudge your soil toward a more neutral, happy medium.
But if you need to make a significant change to your soil pH this season—like making it more alkaline for your lavender or more acidic for your azaleas—you need specific tools for the job. That’s where amendments like lime or elemental sulfur come in.
It’s also fascinating to remember that while we often aim for neutral soil, it's not the global norm. Another surprising fact: the worldwide average soil pH is around 6.36, which is slightly acidic. Huge regional differences exist, all driven by climate and geology. You can dive into the full research on global soil pH patterns to see how your little patch of earth fits into the bigger picture.
Getting to know your garden’s soil is one of the most rewarding parts of the journey. At Tendra, we're all about connecting gardeners to share this kind of real-world knowledge.
Turn your phone into a plant expert with Tendra, available at https://tendra-app.com.


